
Build a Billable Hours Report in Jira for Invoicing
Track billable time, overtime, and fixed amounts on Jira work logs, then report and export for invoicing.
Native Jira keeps one running "time spent" total per work item. It can't tell you how many of those hours are billable, which are overtime at a higher rate, or what fixed amount a deliverable was sold for. So when an invoice is due, you end up rebuilding everything by hand.
JetTime, a time-tracking app for Jira from the Atlassian Marketplace, closes that gap. You capture billable time, billable overtime, and a fixed amount right on each work log, then pull it all into one report per client and export it. From there, building the actual invoice is a copy-paste away.
This guide follows a small agency billing one client for a batch of fixed-price deliverables.
What You'll Set Up First
Two things, configured once in Settings:
- Custom time categories — Billable Time and Billable Overtime, on top of the built-in Regular Time. Overtime is its own category because it's usually charged at a different rate. See Defining Custom Time Categories.
- A currency work log field — a number field with the currency format, e.g. Billable Cost, for fixed-price work where the charge isn't hours times a rate. See Setting Up Custom Work Log Fields.
Keep overtime in its own Billable Overtime category rather than folding it into regular billable time. At invoicing, you'll want the higher-rate hours totalled separately.
Log Time as You Work
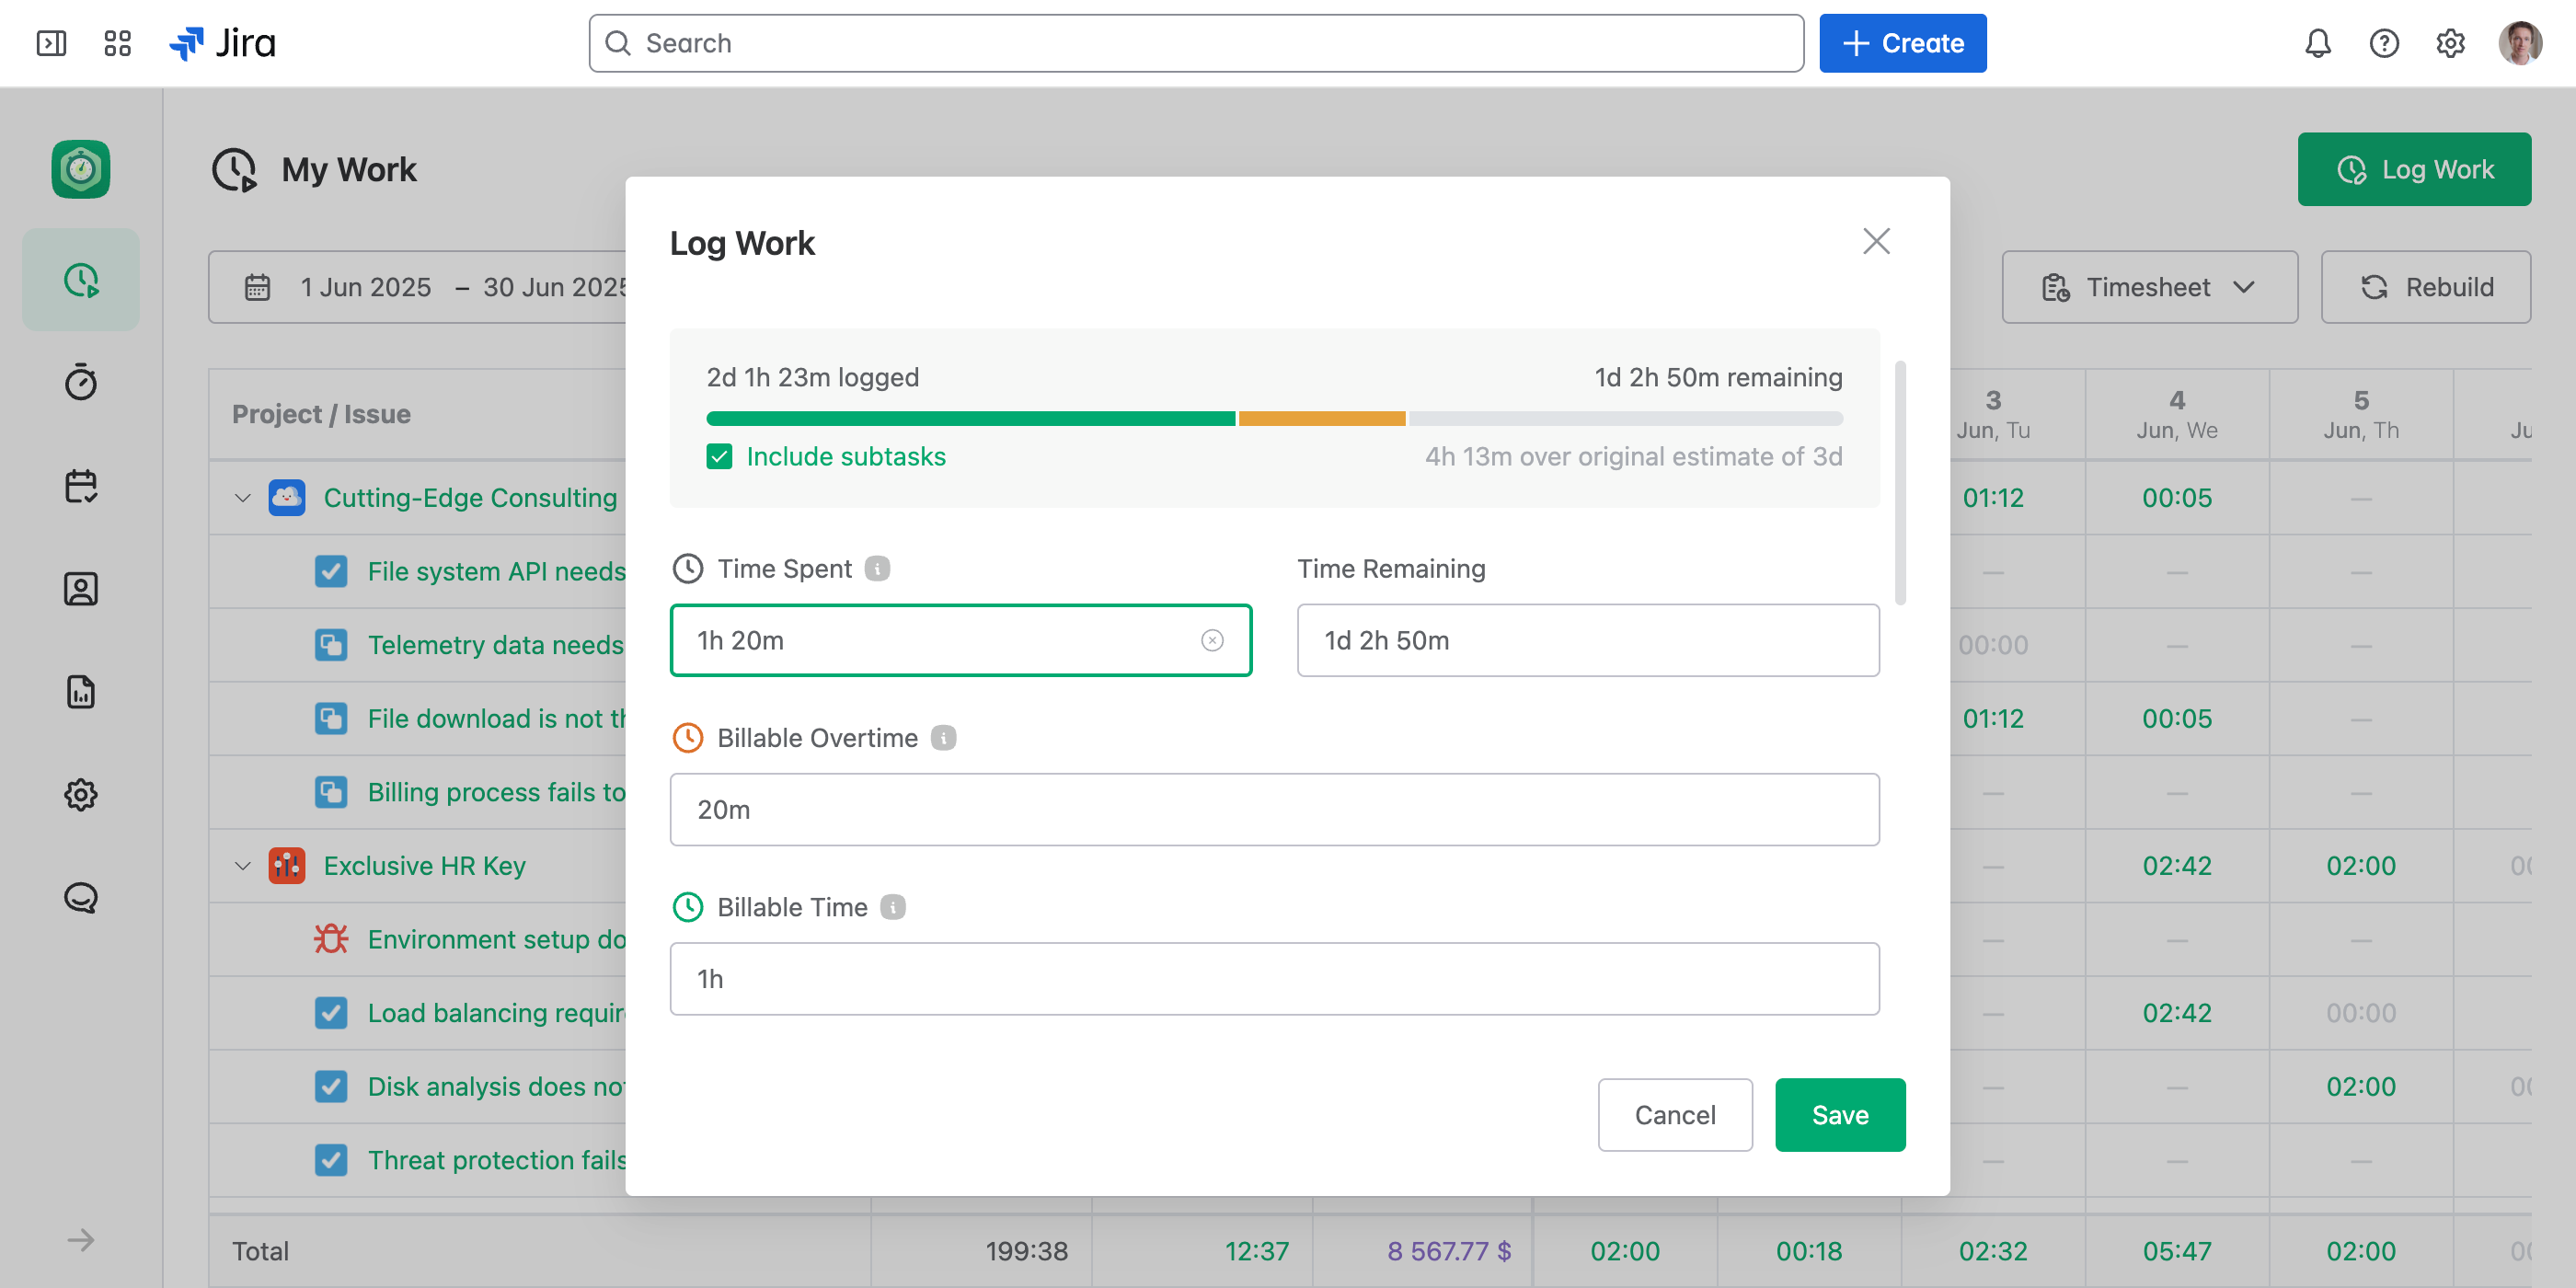
When a work item's scheme includes them, each category shows up as its own row in the Log Work dialog. Fill in the ones that apply for the work you did.
With Field Schemes you can show these billable fields only on client work, and hide them on internal tasks — so the right people log the right numbers.
Pick the client's account
On the work log, set the Account to the client you're billing. This is what lets you pull a clean per-client report later, so do it on every entry.
Enter the hours
Put plain hours under Time Spent (the Regular Time category), client-billable hours under Billable Time, and any higher-rate hours under Billable Overtime.
Add the Fixed Amount
For fixed-price deliverables, the charge isn't tied to hours — a logo, a landing-page article, a brand kit each have an agreed price. Record that in the Billable Cost field as you log the work.
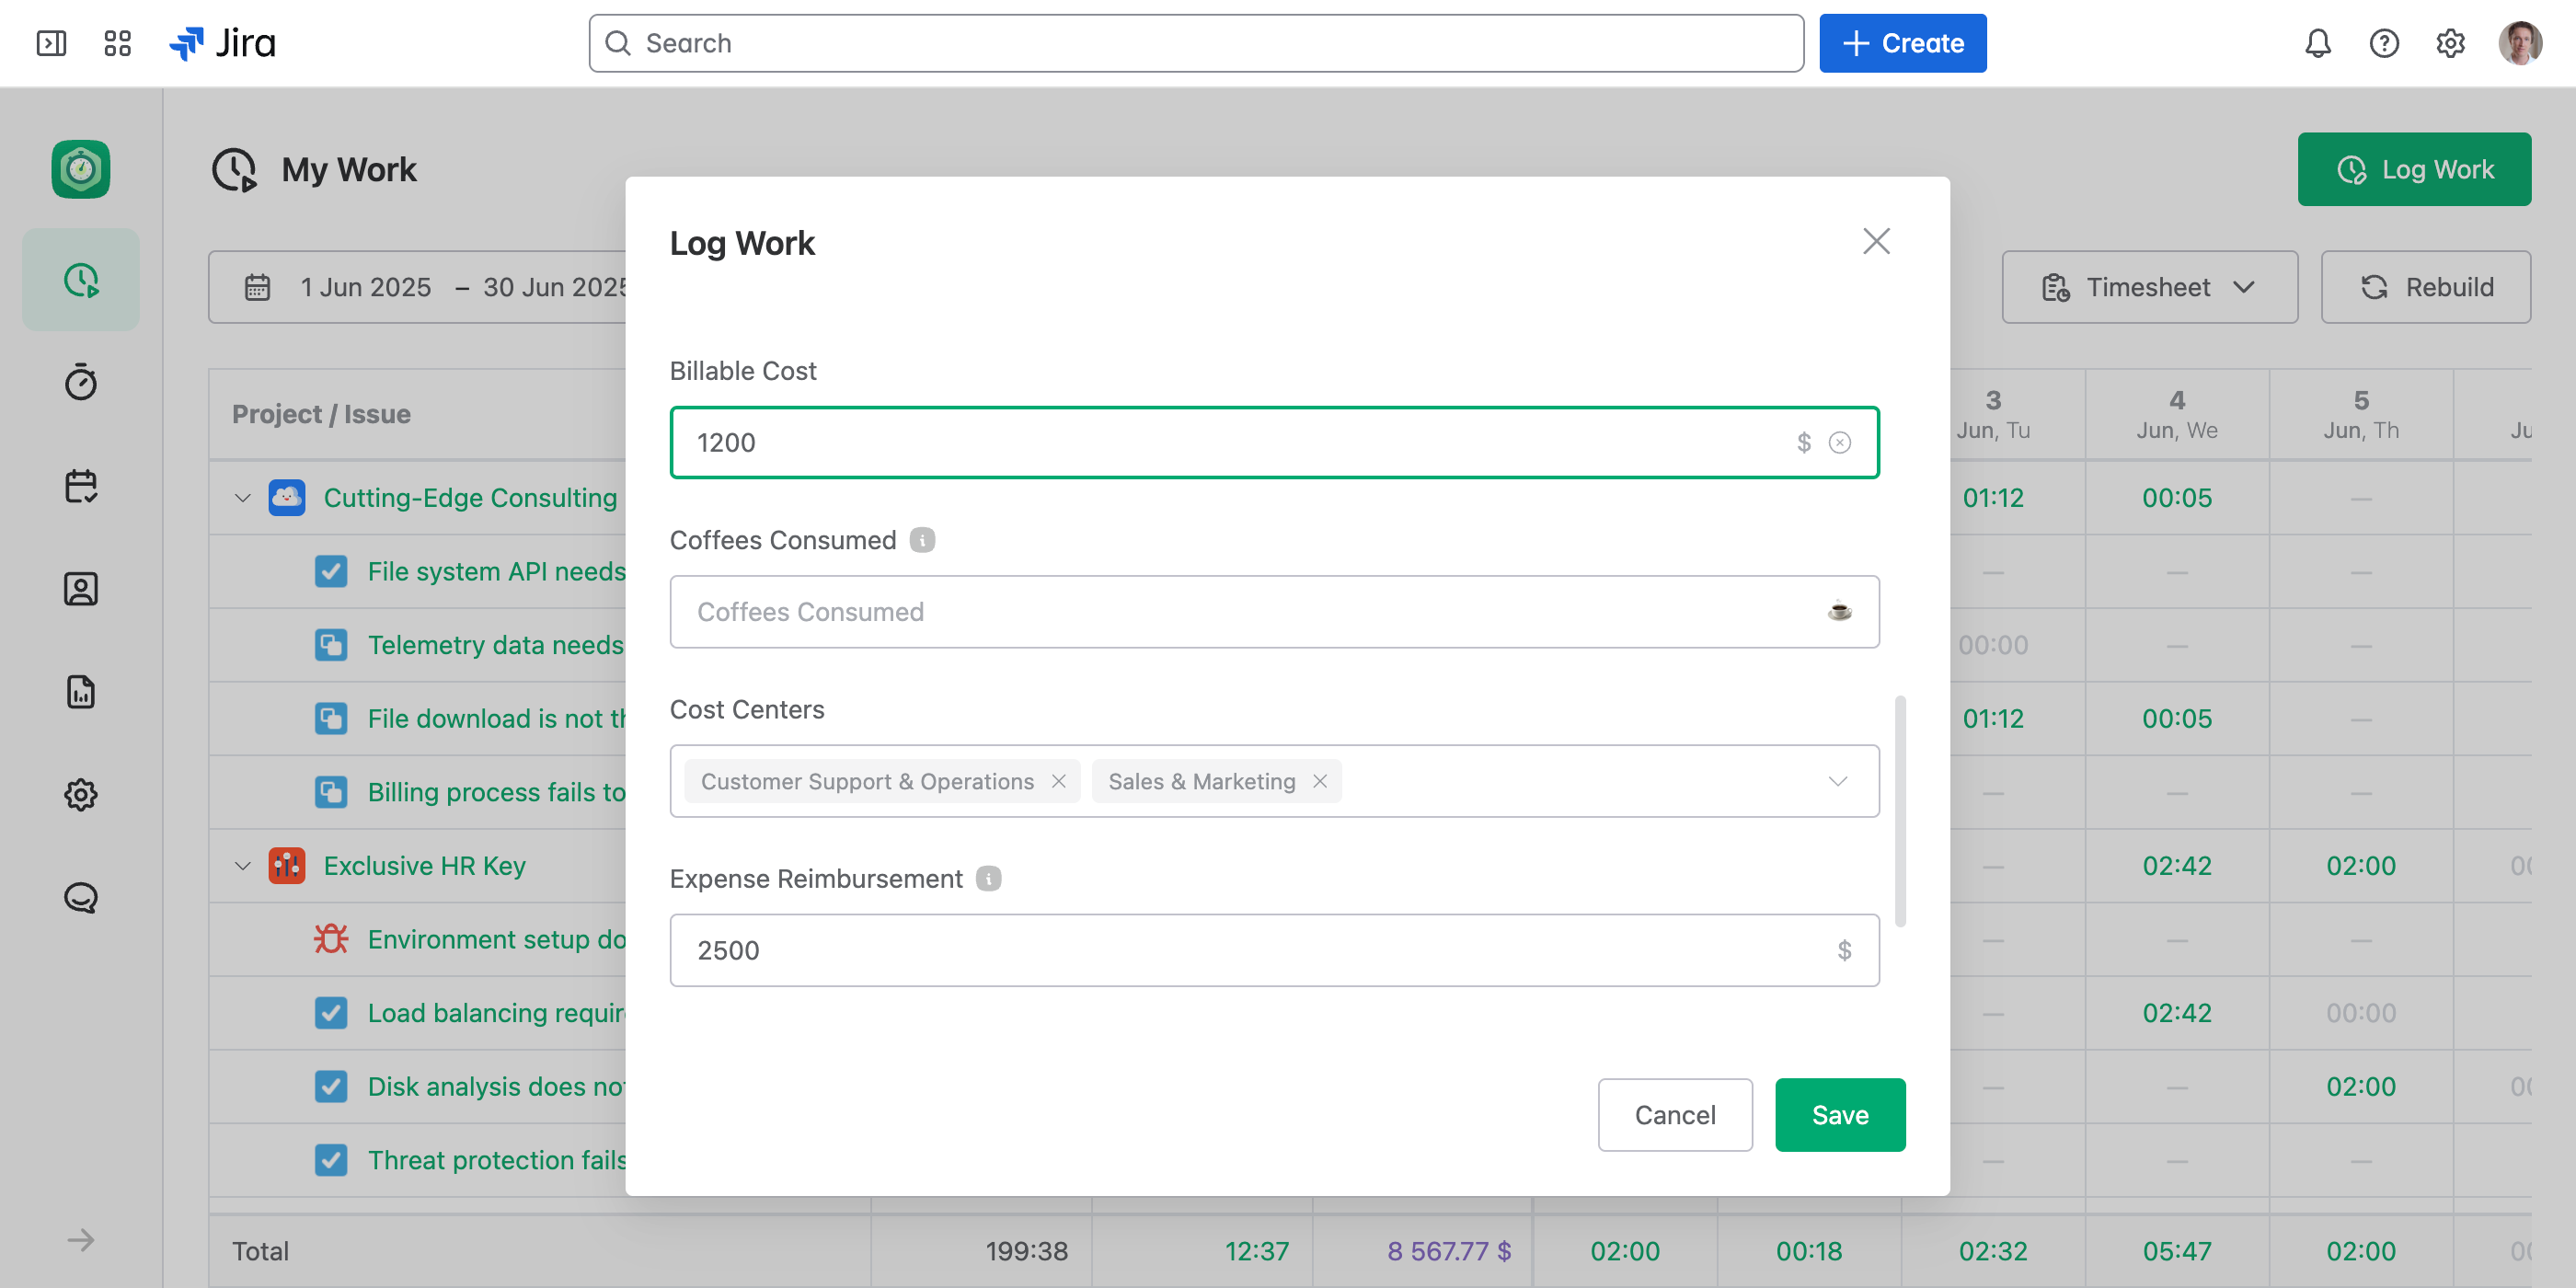
So one deliverable might carry a few billable hours and a fixed cost; another might be cost-only. Both end up on the same report.
Build the Report for One Client
Now turn those work logs into a per-client breakdown.
Open a report and switch to Table view
Go to Reports, open a report, and set the view mode to Table. Table view totals each row, which is what you want for an itemized bill.
Filter to the client
Click Add Filter and filter by the Account you logged against. The report now shows that client's work only.
Group by work item
Group by Work Item so every deliverable becomes its own line — "Logo design", "Landing page article", "Brand guidelines", each with its own totals.
Set the billing period
Set the Date Range to the month you're invoicing for. Only work logged in that period lands on the report.
Add the billable totals as columns
Add the totals you bill on as columns — for example Billable Time, Billable Overtime, and Billable Cost — then Build Report.
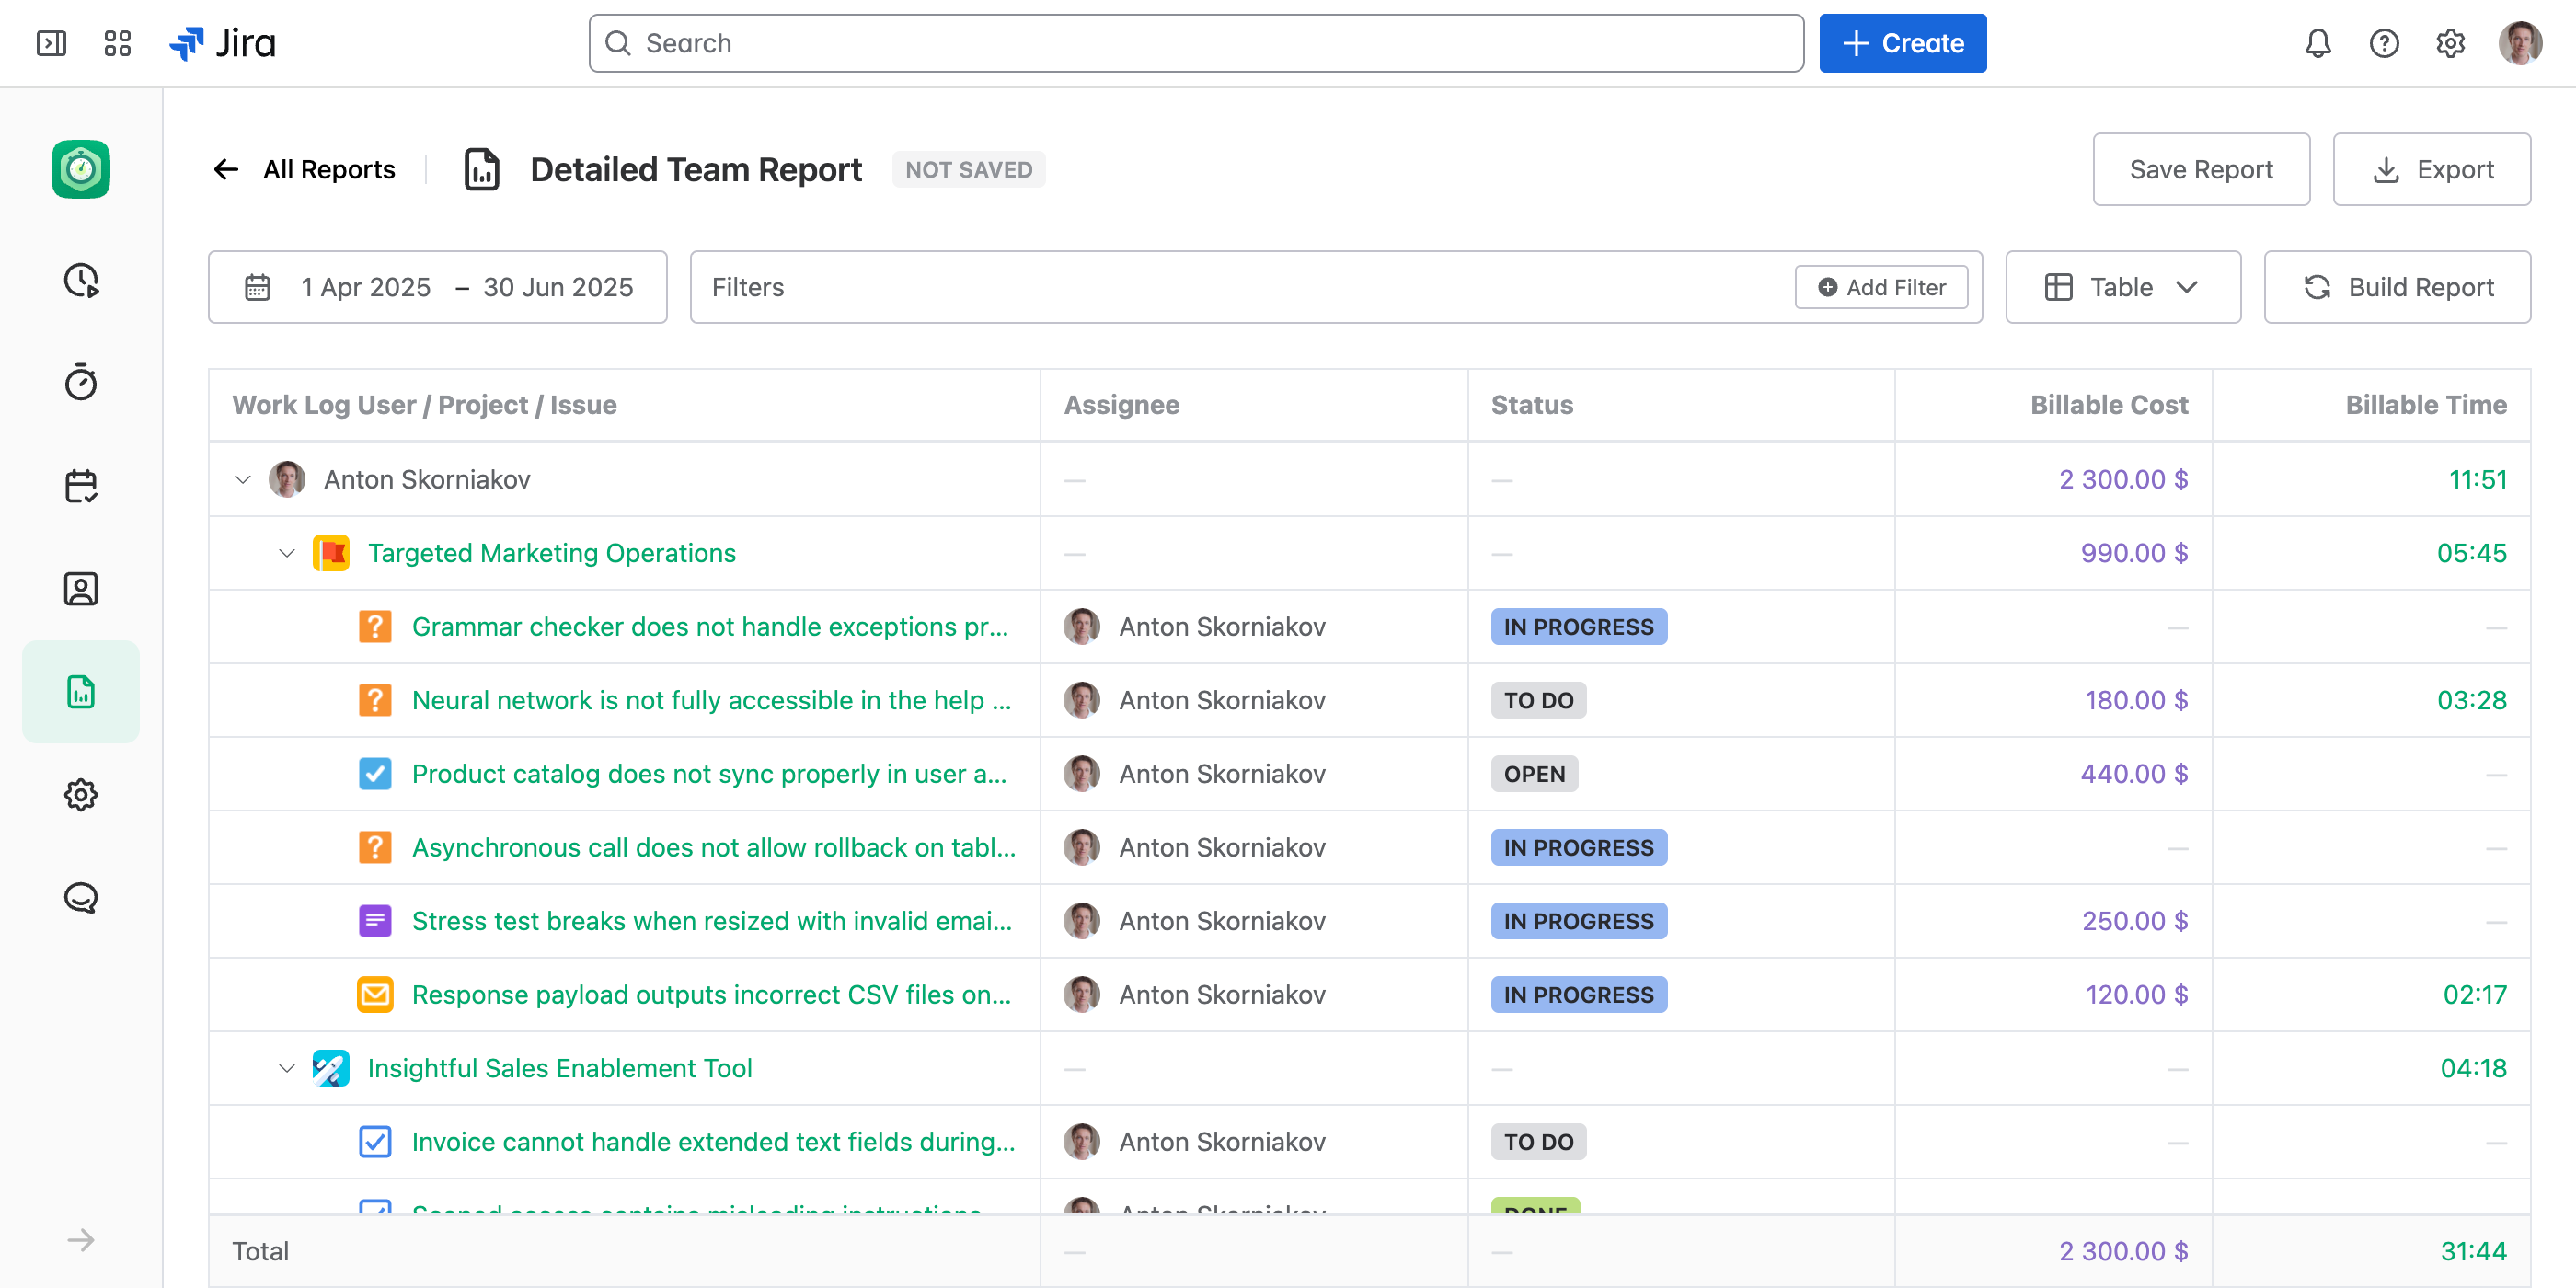
You're looking at exactly what you'll charge: a line per deliverable, the billable totals you added on each one, and a grand total at the bottom.
Export and Invoice
Export the report
Click Export → Excel for an editable sheet, or CSV to feed it into another tool. The export mirrors the on-screen report — same lines, same totals.
Build the invoice
From the exported sheet, apply your rates to the hours, carry over the fixed amounts, and assemble the invoice in whatever tool you bill with. JetTime gives you the verified, per-client numbers to start from.
Your billing data never leaves Atlassian Cloud. JetTime is a "Runs on Atlassian" app, so worklogs and amounts stay inside your own Jira instance.